From 2D profile to 3D part and STEP
A prismatic part starts as a 2D profile. planex2d pads the profile into an OpenCASCADE solid whose side faces carry the names of the profile’s edges, sketches on those faces, pockets the sketches into the solid and writes the result as STEP for any CAD program. The profile can be drawn in code, or read from a DXF or SVG drawing, a planar STEP or BREP file, a sketch from a .CATPart file or a Shapely polygon. The 3D part needs the OpenCASCADE bindings, the optional package planex2d-occ
(pip install "planex2d[occ]"). The first cell is the complete workflow, ready to copy and run, and the section Step by step runs it in parts, with the plots one looks at along the way.
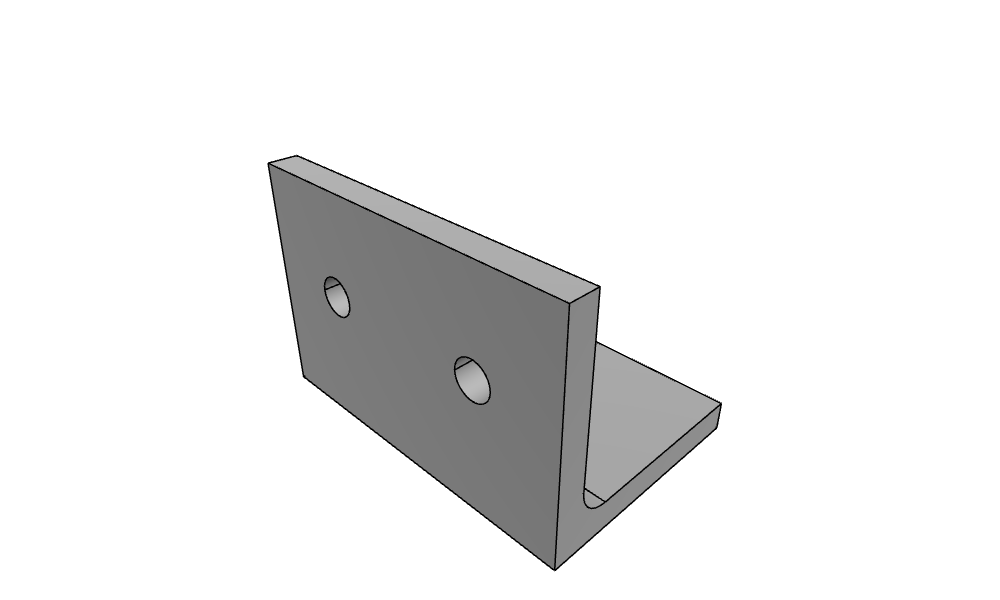
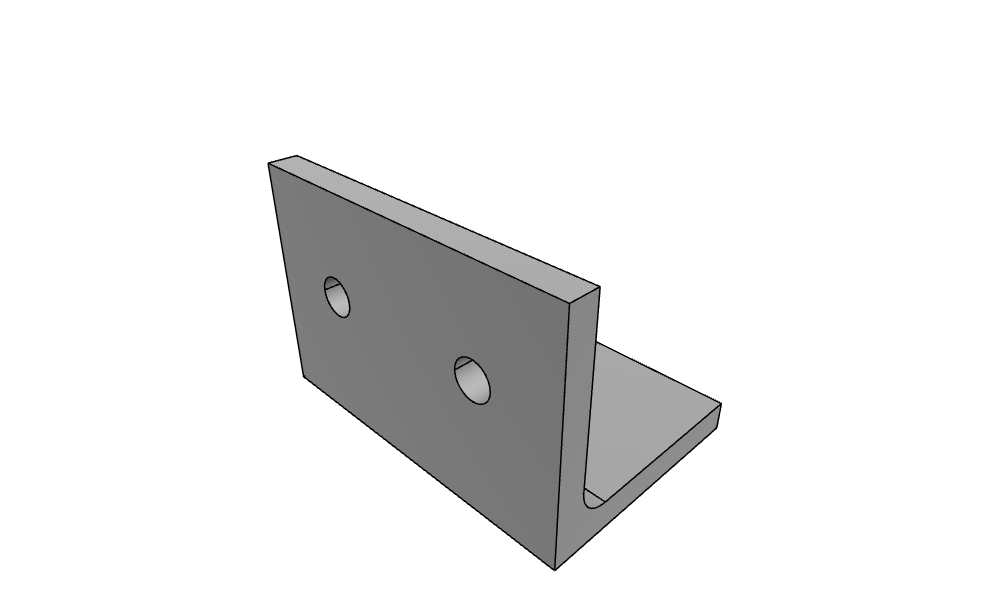
The example is an aluminum angle bracket of 40 × 40 × 5 mm with an inner fillet of radius 5, 60 mm long, with two holes of diameter 6.6 in each leg for M6 screws.
[1]:
import math
import netgen.occ as occ
from ngsolve_webgpu.jupyter import Draw
import planex as px

profile = px.QuickSketch(px.XZ)
profile.Line(40, name="base").Turn(90).Line(5).Turn(90).Line(35)
profile.Turn(-90).Line(35).Turn(90).Line(5).Turn(90).Close(name="back")
section = profile.Face()
section.Fillet(section.vertices("Line.3.end"), 5)
bracket = px.Pad(section, 60)

base = px.QuickSketch(bracket.faces["base"][0]).Circle((20, 15), 3.3).Circle((20, 45), 3.3)
back = px.QuickSketch(bracket.faces["back"][0]).Circle((-15, -22.5), 3.3).Circle((-45, -22.5), 3.3)
bracket = px.Pocket(bracket, base, until=px.last)
bracket = px.Pocket(bracket, back, until=px.last)
print("volume", bracket.mass, "| profile area × 60 less the holes", section.mass * 60 - 4 * math.pi * 3.3**2 * 5)

bracket.WriteStep("angle-bracket.step")
print("read back", occ.OCCGeometry("angle-bracket.step").shape.mass)
Draw(bracket)
volume 22137.663874951973 | profile area × 60 less the holes 22137.66387495197
read back 22137.66387495179
Step by step
The profile
The profile is drawn with the pen on the front plane px.XZ, in millimeter numbers, which OpenCASCADE takes as millimeters. The outer bottom edge is named base and the outer back edge back, so that the faces they become can be found by name later (see Names and colors). Fillet rounds the inner corner. The lines are numbered in the order they are drawn, so the corner is the end of the third, "Line.3.end", and
profile.Plot(backend="plotly"), the plot below, shows every id on hover (see Fillets and chamfers and Picking what to measure). The area is the two legs less their overlap plus the fillet’s corner, \(40 \cdot 5 + 35 \cdot 5 + (1 - \pi/4) \cdot 5^2\).
[2]:
import math
import netgen.occ as occ
from ngsolve_webgpu.jupyter import Draw
import planex as px

profile = px.QuickSketch(px.XZ)
profile.Line(40, name="base").Turn(90).Line(5).Turn(90).Line(35)
profile.Turn(-90).Line(35).Turn(90).Line(5).Turn(90).Close(name="back")
section = profile.Face()
section.Fillet(section.vertices("Line.3.end"), 5)
print("area", section.mass, "exact", 40 * 5 + 35 * 5 + (1 - math.pi / 4) * 5**2)
profile.Plot(backend="plotly")
area 380.3650459150638 exact 380.3650459150638
Padding
px.Pad extrudes the profile into a solid along the normal of its plane, 60 mm, toward \(-y\) for px.XZ. Every side face carries the name of the profile edge it comes from, so the outer faces of the legs are base and back (see Pad and Pocket).
[3]:
bracket = px.Pad(section, 60)
print(sorted({f.name for f in bracket.faces if f.name}), "| volume", bracket.mass)
['back', 'base'] | volume 22821.902754903826
Sketching on the faces
A sketch on a face takes the face’s own plane, and its coordinates follow that plane’s axes. px.Plane(face) shows them before anything is drawn. On base, \(h\) runs along \(x\) and \(v\) along \(-y\), so a hole 15 mm into the bracket is at (20, 15). On back, \(h\) runs along \(y\) and \(v\) along \(-z\), so a hole 15 mm into the bracket and 22.5 mm up is at (−15, −22.5). See Placing a sketch for how a face’s axes are
chosen.
[4]:
print("base | h", px.Plane(bracket.faces["base"][0]).h, "| v", px.Plane(bracket.faces["base"][0]).v)
print("back | h", px.Plane(bracket.faces["back"][0]).h, "| v", px.Plane(bracket.faces["back"][0]).v)
base = px.QuickSketch(bracket.faces["base"][0]).Circle((20, 15), 3.3).Circle((20, 45), 3.3)
back = px.QuickSketch(bracket.faces["back"][0]).Circle((-15, -22.5), 3.3).Circle((-45, -22.5), 3.3)
base | h (1.0, 0.0, 0.0) | v (0.0, -1.0, 0.0)
back | h (0.0, 1.0, 0.0) | v (0.0, 0.0, -1.0)
Pocketing the holes
px.Pocket cuts each sketch into the solid, and until=px.last takes it through to the last face it meets, so the holes go through the 5 mm leg whatever its thickness. The volume is the profile’s area times 60 less the four holes.
[5]:
bracket = px.Pocket(bracket, base, until=px.last)
bracket = px.Pocket(bracket, back, until=px.last)
print("volume", bracket.mass, "| profile area × 60 less the holes", section.mass * 60 - 4 * math.pi * 3.3**2 * 5)
Draw(bracket)
volume 22137.663874951973 | profile area × 60 less the holes 22137.66387495197
Writing STEP
WriteStep writes the solid as a STEP file, in the millimeters it is drawn in, and OpenCASCADE reads it back with the same volume. The file is angle-bracket.step. See To OCC shapes for the other exports, and From DXF drawing to mesh for meshing.
[6]:
bracket.WriteStep("angle-bracket.step")
print("read back", occ.OCCGeometry("angle-bracket.step").shape.mass)
read back 22137.66387495179
Where the profile comes from
Source |
Call |
See |
|---|---|---|
Code |
|
|
DXF |
|
|
SVG |
|
|
STEP, BREP (planar) |
|
|
.CATPart sketches |
|
|
Shapely |
|
Pitfalls
Units. The solid is in the numbers it is drawn in, and OpenCASCADE writes them as millimeters. A profile read from a file comes in meters, and
scale=1on the reader keeps the file’s millimeter numbers instead.The direction of the pad. A pad runs along the normal of the profile’s plane, toward \(-y\) for
px.XZ, whose normal points to \(-y\) so that \(x\) runs to the right and \(z\) up.A face’s axes. A sketch on a face uses that face’s plane, so print
px.Plane(face)before placing anything.Names. Only named profile edges give named faces, so name the edges whose faces are needed later.